This post may contain affiliate links*
I’ve got issues
Kara’s family came into town for the July 4th holiday week – she loves hanging out with our nieces and new nephew, so I took the opportunity to tackle a project that needed to be done ASAP! I thought we either had dirty fuel or a dirty fuel tank potentially leading to bigger issues soon. On our trip back from Chicago, we had the engine grumble to a halt due to a dirty, clogged fuel filter. I had to swap to a spare while out on the water. Although I was successful in making the repair, it shouldn’t continue to happen, so I wanted to get to the root cause.
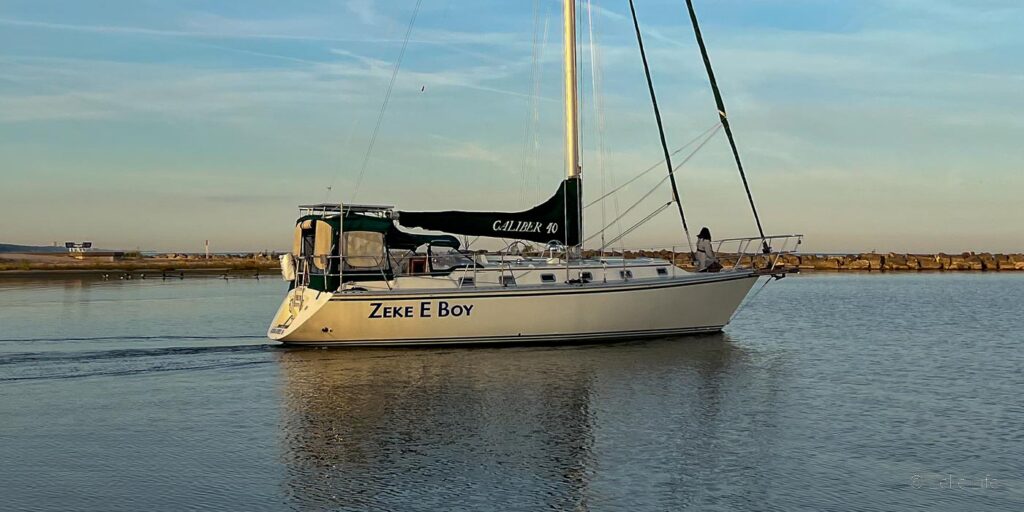
SV Zeke E Boy is a 1996 Caliber 40 LRC. She has 2 fuel tanks built into the bottom of the hull. Tank 1 is about 115 gallons and tank 2 is about 95 gallons, making us capable of carrying 210 gallons of diesel fuel. Our engine is a Yanmar 4JH2E with a KM4A tranny, 50 hp. From what I have gathered in research and experience, we burn about 0.75 gallons per hour at a cruising speed of 6.5 knots. This means, in theory, we could run for 280 hours straight and cover 1800 nautical miles! In reality – for the Great Lakes, that is way too much fuel – possibly several years worth of fuel.
1 step at a time
The previous owners decided not to use tank 1 – only tank 2 and even then, 95 gallons of diesel was too much for a single season – most of the time. In my pursuit of cleaning up the tanks and fuel, I started with opening up tank 1 and inspecting its state. I found ~1 gallon of 27 year old diesel fuel and some diesel bug/gunk on the bottom of the tank. I removed the old fuel and cleaned up the bottom through the two 4” access holes.
Thankfully, I could get my hand to the bottom of the tank – that along with a cheap toilet bowl brush and rag combo to scrub and absorb the fuel and debris. First step done, we now have a clean tank 1 with no fuel in it. 👍
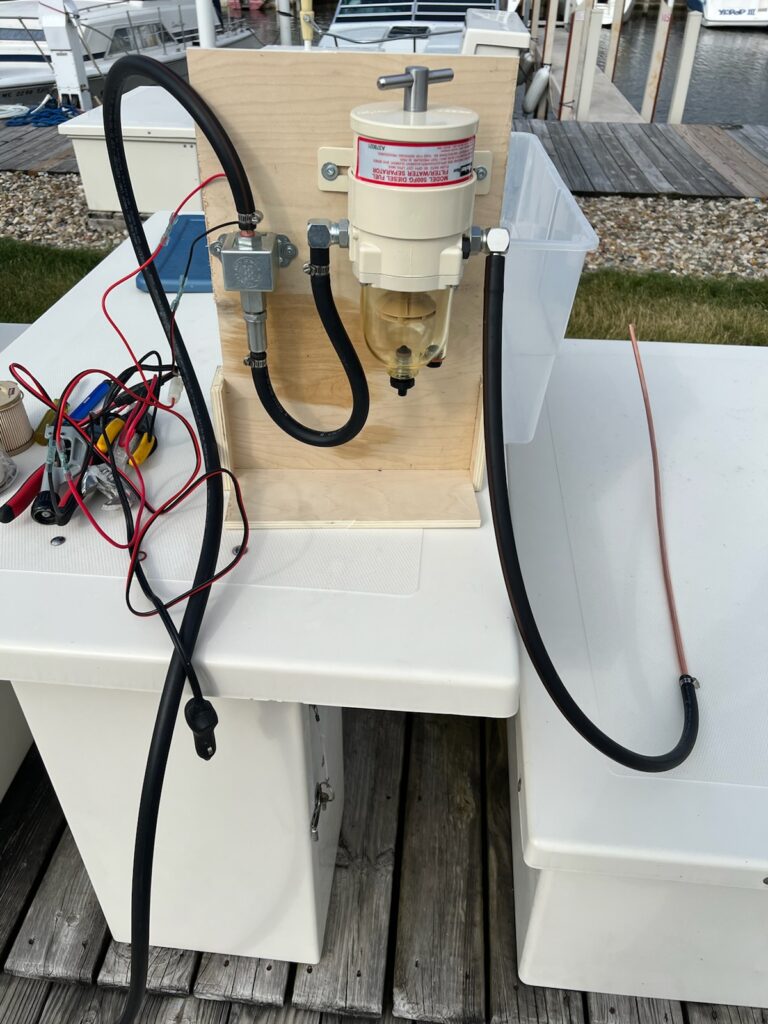
Last year, I built a homemade fuel polisher system, a fancy term for a filter. So I transferred all the fuel from tank 2 into tank 1 using my fuel polisher, which took ~3 hours to complete ~50 gallons of fuel transfer. Once tank 1 was empty, I cleaned up the bottom in the same fashion with my toilet bowl brush/rag combo and found that tank 1 was cleaner than tank 2!
The last major step was to transfer all the fuel back to tank 2 through my polisher and close everything up.
The last critical step
One final note on this project – diesel engines really don’t like air in the fuel, it is a primary cause of issues. So throughout this whole process I had to be very careful on reducing the air infiltration into the fuel lines and then at the end had to bleed all the air out before I attempted to start the engine.
At the end of a project like this, it comes time to start the engine. It took me a few minutes to find the courage to begin. All of the ‘what-ifs’ and ‘oh-nos’ can paralyze. I went through the whole system visually and confirmed that everything looked good, was done and ready to start. My little diesel engine started right up and gave no indication anything had changed. Whew!
What’s up Doc?
In conclusion, I believe that we had poor quality fuel that needed polishing and this process should solve the issue we were seeing while on the water. Next time I will buy fuel from a better source. Worse case scenario, the fuel filter gets clogged and I’ll need to swap in my spare … I’ll just need to make sure we have plenty of spares – once the spare is used, there’s no more spares …
It’s possible that this is now an annual maintenance project to prevent issues in the future.

Tell Us what you think
Have you had issues with your engine? What other projects should I consider? Do you have any other recommendations? Please share your feedback in the comments below.
– Kyle from Zeke Life
Live like Zeke
You’re such a good boy!






Good job!